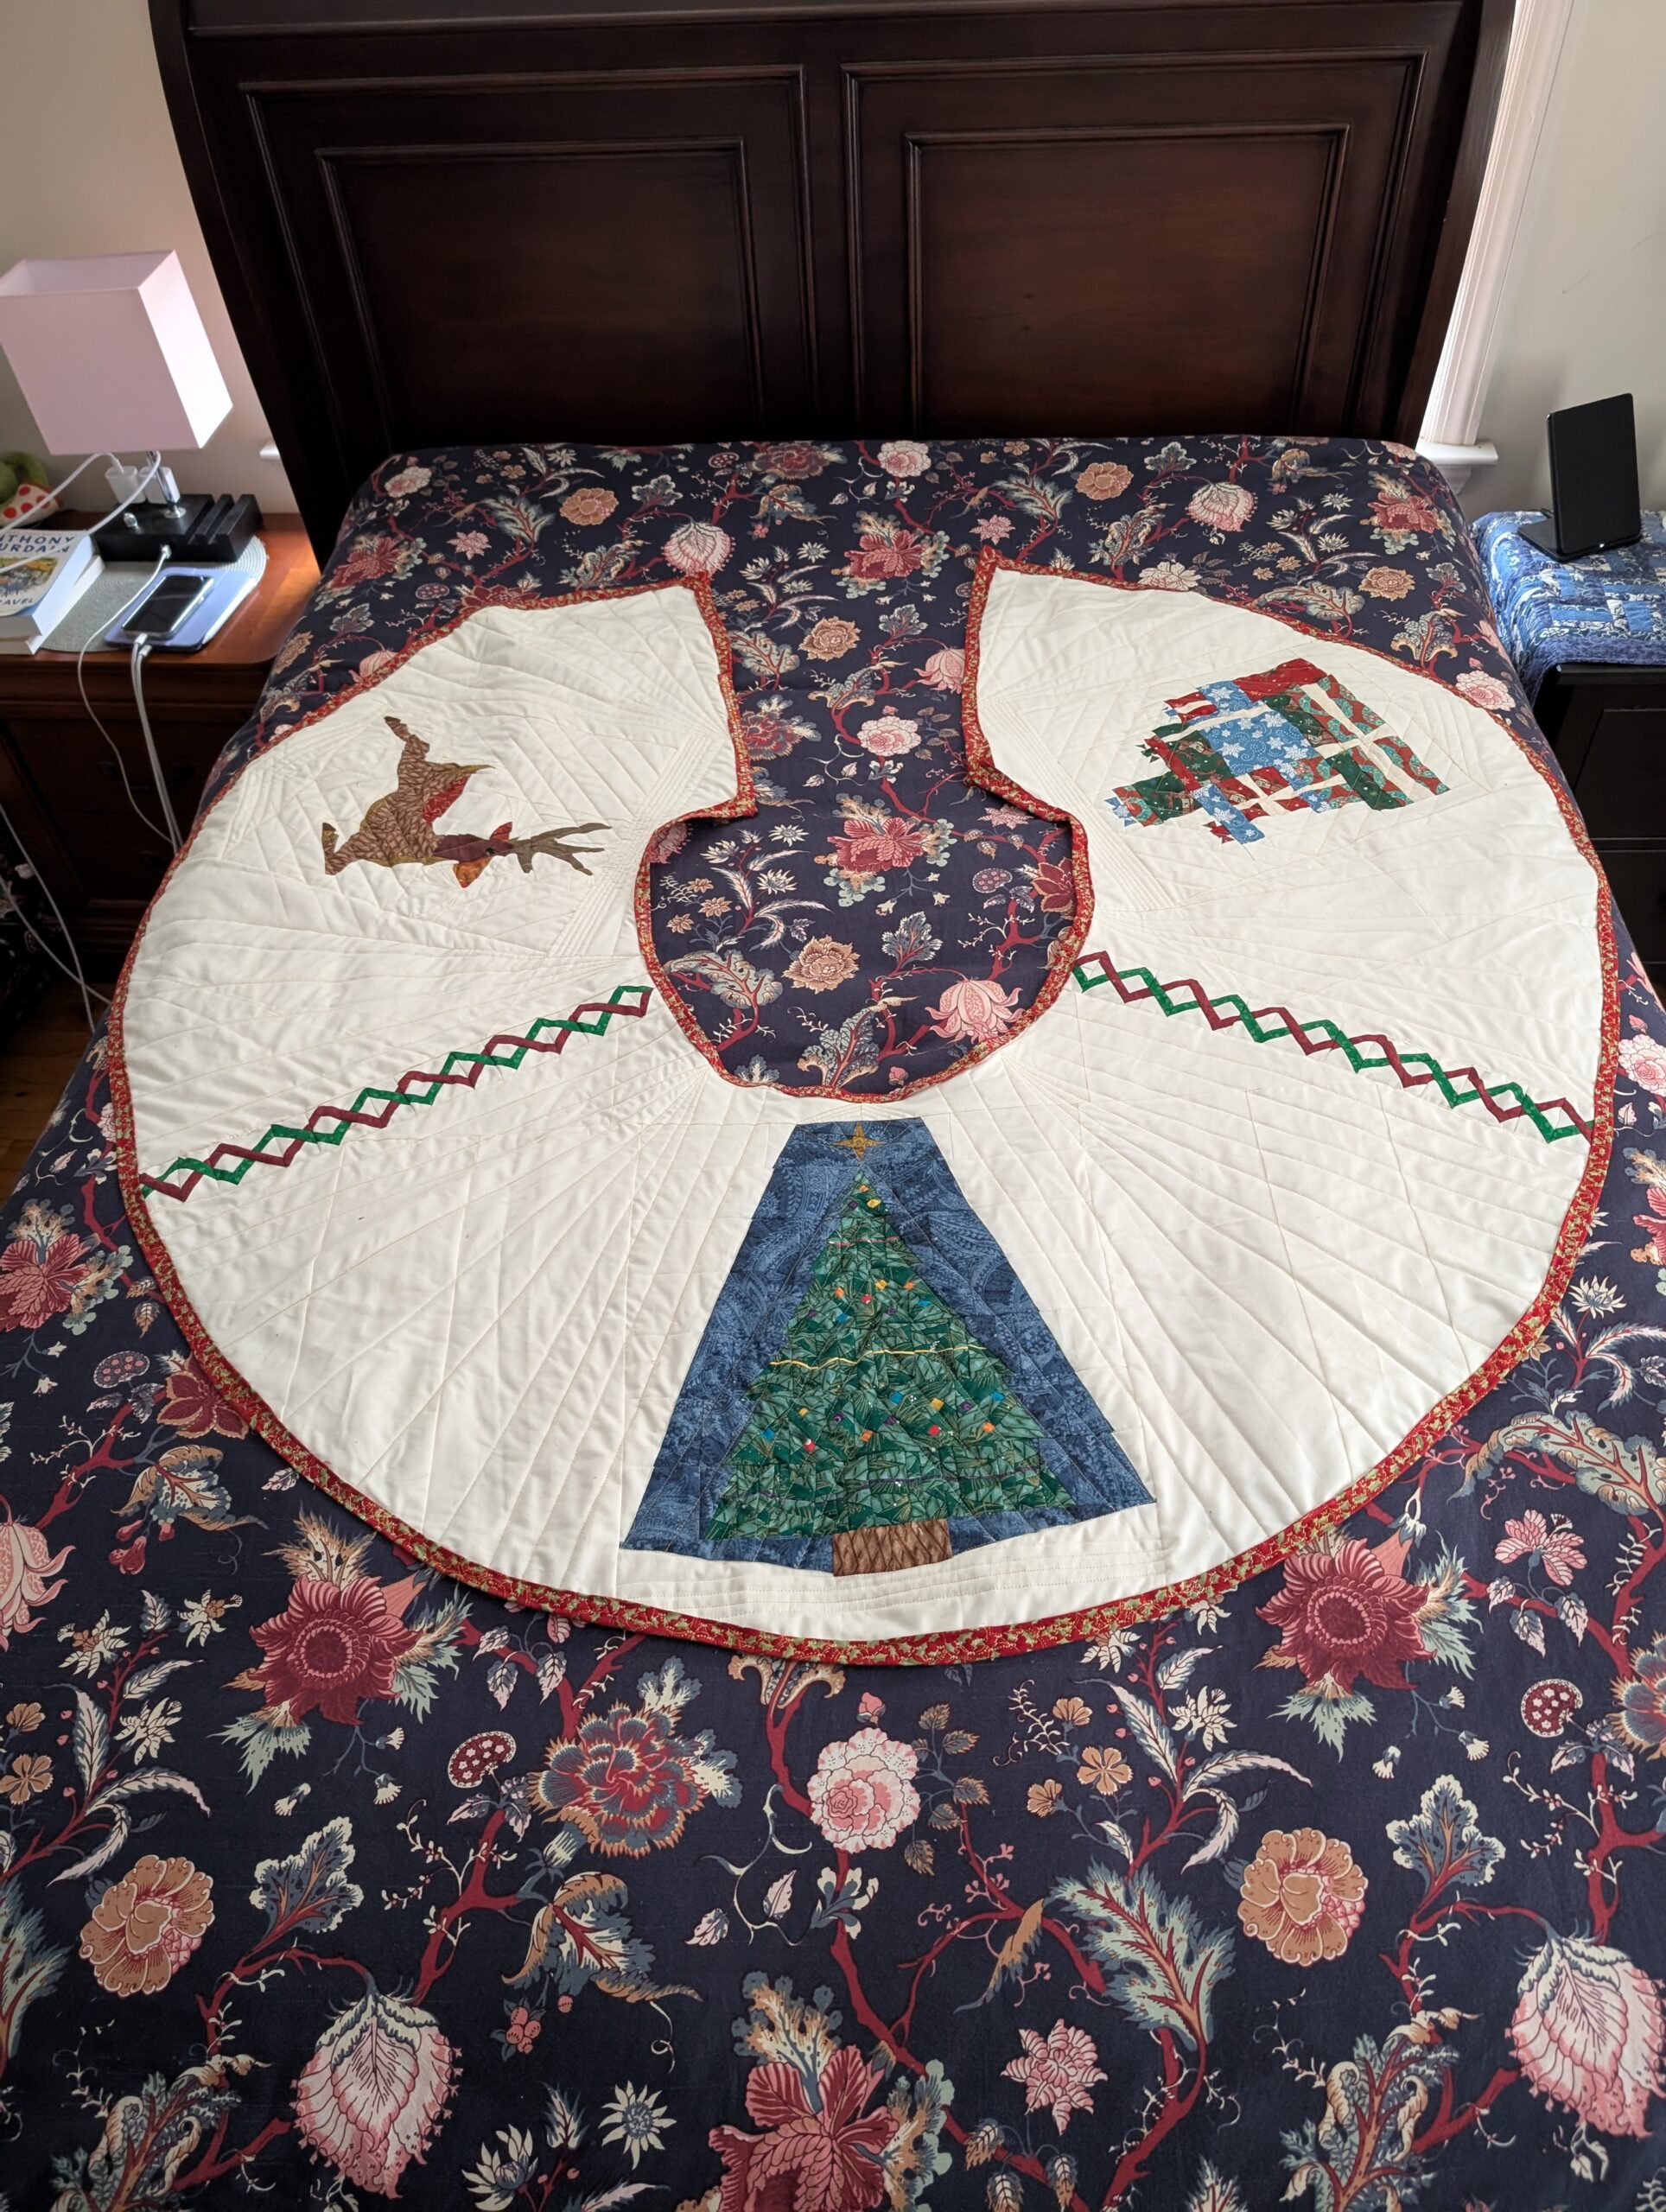
Size: approximately 40-45″ diameter
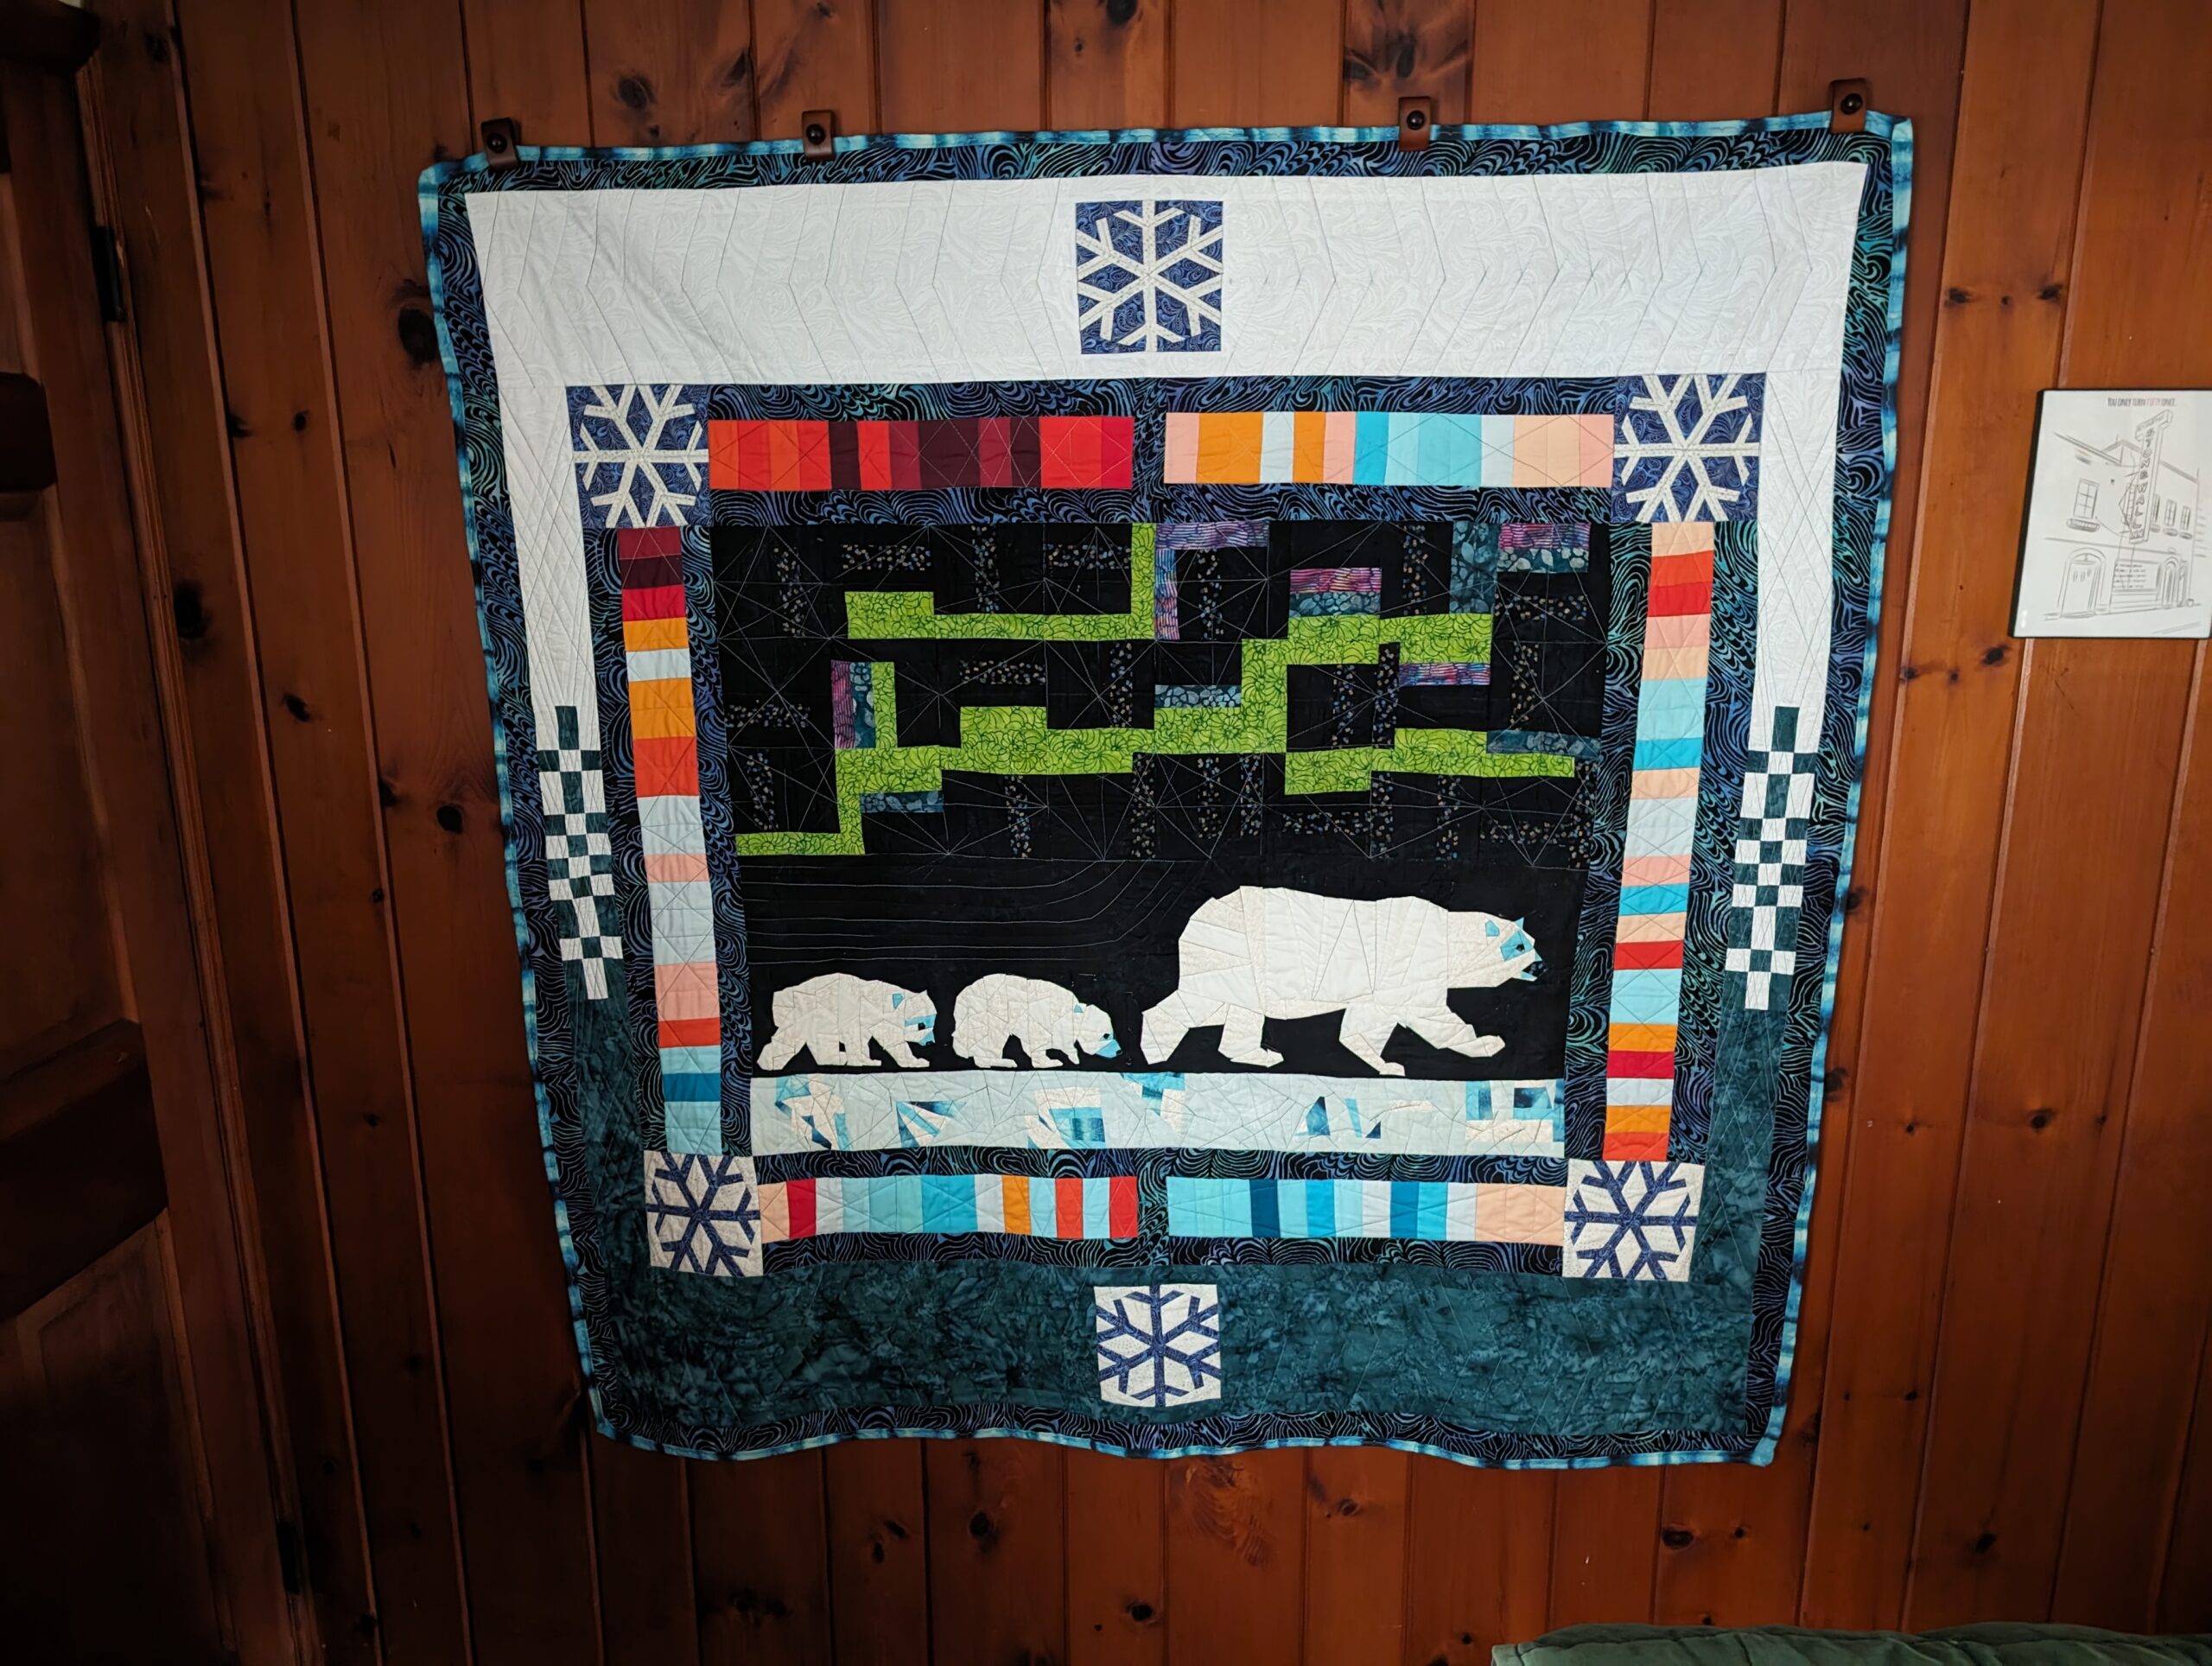
I think the most common image that the average person has when they hear “quilt” is the blanket style of quilts. Which is valid – a lot of quilts are blankets. But I am also fascinated in the other purposes quilts can be made for. I use the very first quilt I started (I should do a post about that one) as a cover on my nightstand. The polar bear quilt was always intended to be a wall hanging. Therefore, one of my earliest ideas was to make a Christmas tree skirt and it took working through several other projects before I was ready to tackle it. I am glad I did because I was more confident in my design and piecing skills, especially with foundation paper piecing. This was also the first full project I was going to do on my upgraded machine (I have a WIP scrap quilt that was the actual first project that I need to get back to).
At the initial idea conception, I was just going to make a rectangular quilt that could be wrapped around the base of the tree. When I sat down to research what size I should make it, I noticed that most tree skirts are circular with a circular hole in the middle, so I decided to change to that shape. Then I needed to figure out how to make it. I also complicated matters when I decided that I wanted to make three tree skirts, the other two as gifts for my sister and mother – and that I would make all three simultaneously.
I am sure there are actual patterns and instructions out there I could have used, but I decided to solve the problem myself. One of the things I enjoy about quilting is how solutions mainly involve breaking a project into smaller and smaller pieces until you get something easy to do, and then just build it up into the larger whole. I decided that I would create three wedges and then connect them with border strips. Each wedge would have a its own focal panel. I went through various ideas of Christmas imagery – I am an atheist so I wanted to avoid any particularly religious images – and settled on a Christmas tree, a reindeer, and a pile of gifts. For the border strips, I have wanted to piece some sort of helix shape for a while and decided this was a good time, I figured that would also be a useful FPP pattern to keep in the toolbox for future projects. The white background on the wedges were assembled as various rectangles and then I measured and cut the radii and the curves to get the shape I wanted.
Then it was a process of designing the center blocks and doing the piecing. I managed to make all three Christmas tree blocks and most of the reindeer blocks before I felt that it was getting to close to Christmas for me to finish all 3. This worked out because I found I did not fully think about my backing fabric, and discovered that it was a standard 42″ wide and I had to Frankenstein pieces together to cover the whole area. I had enough for one, and I needed to order more for the other two in the future. I focused on finishing the one I would keep and managed to barely slip in under the wire and finished the binding at about 4:30 am on Christmas morning. I put it around the tree and went to bed.
Following the holidays, I got back to finishing the other two and managed to wrap up both those projects in March 2025, after having to order a bunch more white fabric (I massively underestimated how much white I would need!) and more backing fabric which is why the second and third skirts match, but the first one is different. I still have the two skirts sitting on my quilt stand waiting to be given as gifts, since I felt it would be odd to give them in March, and they’ll be more useful if I give them around Thanksgiving.
Overall, I was really pleased with how they came out. I need to work on my color choices in places, because I know the Christmas trees get lost in the blue background – I was trying to simulate an evening sky but the colors muddle too much. Trivia: the blue background fabric for the Christmas trees was from my leftover backing of the polar bear quilt. I have since learned about the trick of photographing the fabrics together in black & white and it will help determine if there is enough contrast. The Christmas trees were interesting to design because I tried to have some sort of randomness in the “branches” and in how the decorations were arranged. It is really tough to design randomness though because most of our minds are keyed to looking for patterns and we like to mentally settle into patterns. I am also really fond of the reindeer blocks. I am considering doing a couple of more and using them to make throw pillows to have out as Christmas decorations – just another project to add to the queue.
(more…)